Cyantypes.
Scissors.

The Cyanotype process is very simple. It consists of treating a surface with iron salts that reacts to UV light. For this the Chemicals used were Ammonioum Ferric Citrate and Pottasium Ferricyanide. Two seperate solutions are made and then equal quantitys of each solution is mixed together in a third container.
To begin i dissolved the chemicals in water to form two seperate solutions, I stirred them with a plastic spoon until they were finally disolved. Then I poured equal amounts of each solution into a third container. You can store any unused and left over solution in a brown bottle away from sunlight but once they have been mixed they won't last very long, so you need to throw them away in a sensible, environmentaly friendly way.
After this I used a brush to coat my paper with the chemicals, make sure your working area is dim lighted, then I left my paper to dry. Once it was dry I took it outside and placed objects on it really quickly because it starts to develop as soon as it is exposed to sunlight. The objects I placed on it were scissors, buttons, shells and a zip. Then I left it to expose for about two minutes. When I feIlt it was done I removed the objects and placed the paper into cool water, this removes any unwanted chemicals and develps it further. I left it in the water for about 5 minutes. I watched the colours change and then removed it. Finally I hung it on the washing line in the classroom and waited for it to dry and it was complete.
Colour pop.
Berry.
To get this image in this way I started out by opening it out in Photoshop. Then I went to the layers and adjustments section and changed the colour to Black and White. Then I changed the Foreground colour to Black and went on the brush tool and painted over the areas that I wanted to be in colour and changed the brush size to a reasonable size and the hardness to 100% then once all the main areas had been put in colour I zoomed in and changed the brush size to a smaller one and the hardness to 25% so that I could get all aroun
Light Drawing.
Heart.
To take these light drawings I changed the shutter speed on my camera to 4
seconds. This was to ensure that the drawer had enough time to make a decent
drawing to give me a good image.
seconds. This was to ensure that the drawer had enough time to make a decent
drawing to give me a good image.
Composites.
Sofa.
Composite imaging is a great way to put a spin on an image, it brings something different to the table rather than just your average image. To create my composite image I put my camera on a flat surface facing the sofa, and took three photos of myseplf using the self timer setting. Then for my actual composite image I opened out my first image into photoshop.
Them I duplicated this page as a backup incase anything was to go wrong and I couldn't sort it out. To duplicate I dragged the background layer to the New layer tool. Then I dragged my second image on top of the first image and it oppened a new layer. I then added a layer mask using the mask layer tool. The layer mask allows you to make parts of the photo transparent so you can see the image below. If you paint with black onto the image then it makes the area you have painted become transparent and reveal the photo underneath. To paint with black I went to the layer mask thumbnail and changed the foreground colour to black and then I chose a relevent brush size that was soft and round. Then I painted over the area that I wantedto become transparent and it revealed the photo underneath.
I then added a third photo, I dragged this photo on top of what I had already done. I then added a layer mask to this layer and repeated the steps just carried out on the other layers. If my accident I revealed too much of the image inderneath then to get back what i had just got rid of I would change the foreground colour to white and then brush over my mistake. I would also make sure the oppacity was 100%. If I needed to remove the layer mask for any reason then I would just press shift and then click the layer mask and it would dissapear, and then to get the layer mask back I would just do the same.
Macro.
Flowers.
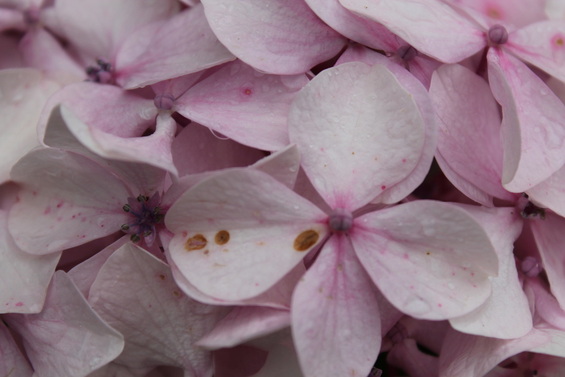
To capture this photo I used the macro setting on my Camera. Using the macro setting to take pictures it allows us to see things that we wouldn't usually be able to see with our naked eye. We usually use this for things that are very small and then we make them larger than life with the macro setting.
Depth of Field.
Lifeboats.
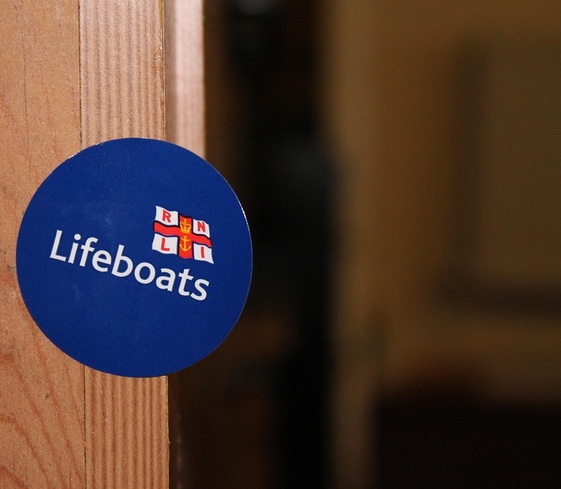
To take these photographs I used the f setting of 4.0 and the ISO setting of 1600. I like how depth of field can signify a certain object in a photograph by de-emphasizing the background and then emphasizing foreground and forcing the person looking at the photo to just look at that one thing.